Settings
Пункт меню «Настройки» содержит в себе 8 подпунктов:
- Global Settings;
- WMI;
- SNMP;
- LDAP AD;
- Users;
- Notification configurations;
- License;
- About program.

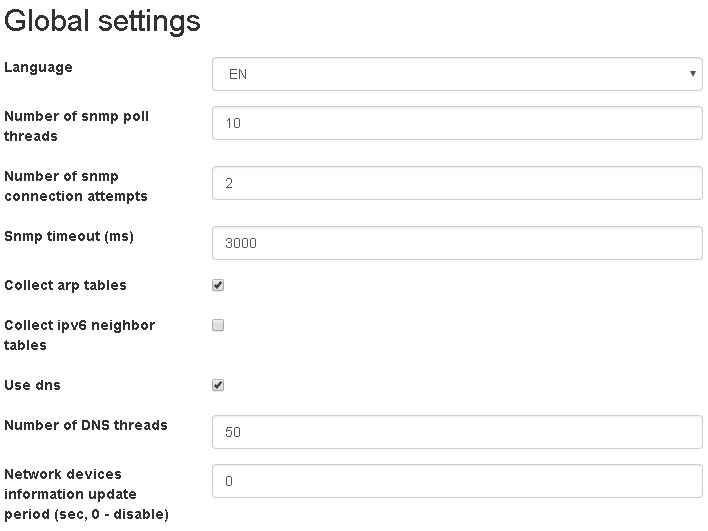
Submenu “Global settings”
- Language
- The language of the web interface of the program. The program is currently translated into two languages: Russian (RU) and English (EN). Default: EN.
- Number of snmp poll threads
- The number of threads used to poll network devices via SNMP protocol concurrently. Default: 10.
- Number of snmp connection attempts
- The number of connection attempts to poll a particular network device via SNMP protocol. Default: 2.
- Snmp timeout
- The time to wait for a response from the network device in milliseconds when it is polled via SNMP protocol. Default: 3000.
- Collect arp tables
- If this option is enabled, the ARP tables will be collected from network devices and an IPv4 address will be written to network report. Default: Enabled.
- Collect ipv6 neighbor tables
- If this option is enabled, the neighbor tables will be collected from network devices and an IPv6 address will be written to network report. Default: Off.
- Use dns
- If this option is enabled, DNS reverse queries will be performed to resolve hostnames of endpoints during snmp poll. Ip addresses will be taken from arp and neighbor tables of network devices. Default: Enabled.
- Number of DNS threads
- The number of threads used to resolve names concurrently. Default: 50.
- Network devices information update period
- The time period in seconds after which the state of ports, vlans of network devices will be updated. Also uptime, sysName, sysDescr, sysObjectId of network devices will be updated. If a network device does not respond to SNMP requests, a record will be written to network device logs. If the device becomes available again, a record will be written to network device logs. Also, if notification configurations are configured, notifications will be sent when the status of the network device changes. 0-Disable. Default: 120.
- Wmi poll enabled
- Enable poll via WMI protocol for IP addresses. The option will be used only if the time of the “Reports update period” option is not null. Default: Off.
- Number of wmi poll threads
- The number of threads used to poll IP addresses via WMI protocol concurrently. Default: 1000.
- Number of wmi query attempts
- The number of connection attempts to poll a specific IP address via WMI protocol. Default: 3.
- Wmi query timeout
- The time to wait for a response from a specific IP address in milliseconds when it is polled via WMI. Default: 30000.
- Ip addresses origin for wmi poll
- Arp and neighbor tables of network devices - ip addresses for poll via WMI protocol will be obtained from arp and neighbor tables of network devices, then these addresses will be filtered using scanned networks from Settings-> WMI-> Scanned networks menu item, then filtered addresses will be polled. Generate based on wmi scanned networks- ip addresses will be generated based on scanned networks from the menu item Settings-> WMI-> Scanned networks, and then they will be polled. Scanned networks from the menu item Settings-> WMI-> Scanned networks with the status “Poll force” will be polled regardless of this option. Default: “Arp and neighbor tables of network devices”.
- Enable ping of ip address before wmi query
- Ping an IP address before WMI query. Default: Off.
- Ping timeout
- Ping timeout in milliseconds. Default: 1000.
- Number of ping attempts
- Number of ping attempts. Ping is successful if at least one response have been received. If no ping attempt succeeds, an IP address will not be queried by WMI. Default: 3.
- Enable LDAP active directory users synchronization during wmi poll
- If the option is enabled users and their attributes will be synchronized to the program from Active Directory. This option is only valid when the “Wmi poll enabled” and “Reports update period” options are enabled. Default: Off.
- Reports update period
- The time period in seconds after which network devices will be polled and mac, arp, neighbor tables will be collected. Ip addresses will also be polled via WMI protocol, an LDAP poll will be performed. All reports will be updated. 0 - Disable. Default: 0.

Подпункт меню «SNMP»
Подпункт меню содержит информацию об учетных данных SNMP, которые используются при опросе сетевых устройств. Учетные данные можно добавлять, редактировать и удалять.
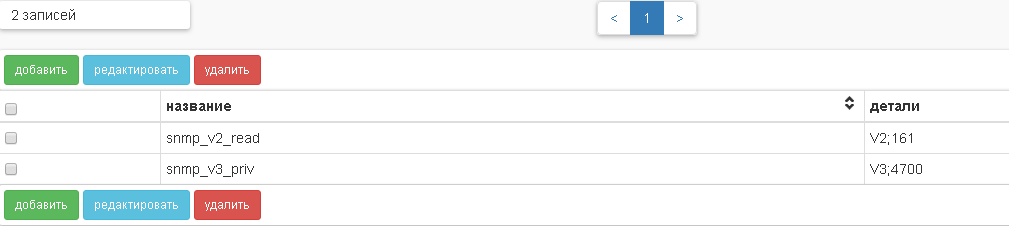
Table columns:
- name;
- details.
При добавлении учетных данных необходимо указать:
- Название;
- Порт;
- Snmp версия;
- Snmp community (только для Snmp версий V1 и V2);
- Snmp security Name (только для Snmp версии V3);
- Snmp security level (только для Snmp версии V3);
- Snmp auth protocol (только для Snmp security level AUTH_NO_PRIV, AUTH_PRIV);
- Auth key (только для Snmp security level AUTH_NO_PRIV, AUTH_PRIV);
- Snmp priv protocol (только для Snmp security level AUTH_PRIV);
- Priv key (только для Snmp security level AUTH_PRIV);

Редактирование учетных данных аналогично добавлению.

Удаление учетных данных SNMP: можно выделить сразу несколько записей учетных данных и удалить их.

Submenu “WMI”
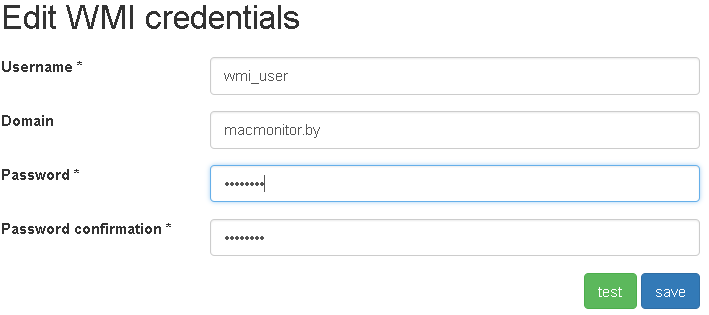
WMI credentials tab
WMI credentials – credentials that will be used for the WMI poll of IP addresses (if “Wmi poll enabled” and “Reports update period ” options are enabled in the global settings).

Table columns:
- domain;
- username.
You can add, edit, and delete WMI credentials.
When adding credentials, specify:
- Username
- Username.
- Domain
- A domain can be specified both in full and abbreviated form: for example, macmonitor.by or macmonitor. If the domain is not specified, the credentials will be considered the credentials of the local user on the computer. An empty domain should be used only if there are computers in workgroup (not in domain).
- Password
- User password.
- Password confirmation
- User password confirmation.

Note
It is possible to test the credentials using the ip address of the computer, to do this, click the test button and enter the ip address of the computer.
Editing WMI credentials is similar to adding them.
Removing WMI Credentials: You can select multiple credentials at once and delete them.

Note
Recommendations:
- use only two credentials records: first is for domain computers, second is for computers in workgroup, since when polling ip addresses, the credentials will be used in turn until they are suitable, or all will not be used. With a large number of them, WMI polling will take longer.
Scanned network tab
Scanned networks are the ip networks whose ip addresses will be queried during the WMI poll (if “Wmi poll enabled” and “Reports update period” options are enabled in global settings, and there are at least one WMI credentials record).

Table columns:
- network;
- mask/prefix;
- network status;
- activated;
- description.
You can add, edit, and delete scanned networks.
When adding a scanned network, specify:
- Network
- Ip network.
- Network mask
- Mask for ipv4 network, prefix for ipv6 network.
- Network status
- “Poll” - ip addresses in this network will be polled depending on the option “Ip addresses origin for wmi poll” in Global Settings, “poll force” - ip addresses in this network will be polled regardless of global settings (option “Ip addresses origin for wmi poll” in Global Settings), “not poll “- ip addresses in this network will not be polled. Networks with the status “not poll” have priority over networks with the status “poll force” and “poll”.
- Activated
- Activated.
- Description
- Description.

Editing a network is similar to adding it.

Delete scanned networks: You can select multiple networks at once and delete them.

Note
Recommendations:
- use the value “Arp and neighbor tables of network devices” option “Ip addresses origin for wmi poll” in the Global Settings;
- add records with the status “not poll” for gateways, broadcast addresses, addresses of not windows computers, etc.
Submenu “LDAP AD”
В этом подпункте меню можно добавить, редактировать, протестировать, удалить конфигурации для опроса LDAP серверов (Контроллеров Домена) с помощью LDAP протокола. LDAP опрос происходит после WMI опроса для синхронизации пользователей и их атрибутов из Active Directory.

Table columns:
- details;
- description;
- activated.
When adding LDAP configurationr, specify:
- Username
- Username in the format name@Domain.
- Password
- User password.
- Password confirmation
- User password confirmation.
- Search base
- Search base.
- Primary ldap server
- Ip address or host name of the primary ldap server.
- Primary ldap server port
- Primary ldap server port.
- Primary ldap server ssl use
- Primary ldap server ssl use.
- Secondary ldap server
- Secondary ldap server (optional field).
- Secondary ldap server port
- Secondary ldap server port (optional field).
- Secondary ldap server ssl use
- Secondary ldap server ssl use (optional field).
- Connection timeout
- Connection timeout in seconds.
- Full username Ldap attribute
- Full username Ldap attribute. The default value is displayName.
- User phone ldap attribute
- User phone ldap attribute. The default value is telephoneNumber.
- Description
- Description (optional field).
- Activated
- Activated.


Note
It is possible to test the LDAP configuration. To do this, click the test button when you add it.
Editing LDAP configurations is similar to adding them.


Delete LDAP configurations: You can select multiple configurations at once and delete them.

Note
Recommendations:
- use LDAP ports 3268, 3269 (global catalog ports) instead of 389, 636.
- when using ldaps (the active flag “Primary/Secondary ldap server ssl use”), the settings for truststore are required. Java launch with Djavax.net.ssl.trustStore, Djavax.net.ssl.trustStorePassword options are required.
Submenu «Users»
Вкладка «Внутренние пользовател軶
В этом подпункте меню можно создавать, редактировать и удалять внутренних пользователей программы. Так же пользователям можно менять пароль, назначать группы и способы оповещений.
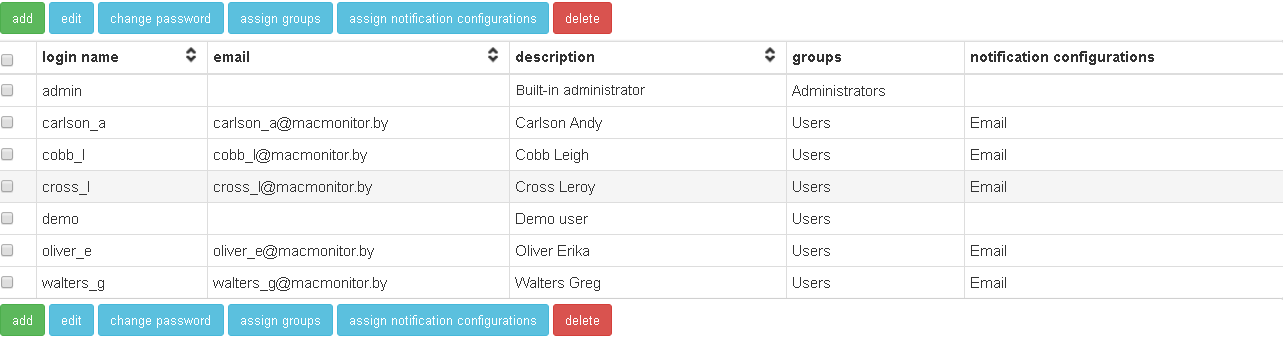
Table columns:
- login name;
- email – e-mail to notify the user;
- description;
- groups -groups, which a user is member of;
- notification configurations.
When the program is installed, user admin, a member of the Administrators group, with the admin password will be available. The admin user cannot be deleted and it’s group cannot be changed, but it is possible (necessary) to change its password.
Каждый пользователь может являться членом одной или нескольких групп:
- Administrators
- Full functionality of the program is available to this group.
- Users
- Этой группе недоступна возможность изменения данных в программе, за исключением запуска SNMP, WMI, DNS, LDAP опроса при нажатии «Обновить» в пункте меню Отчеты→Сеть.
- Администраторы Windows
- Этой группе доступно все, что и группе Пользователи. Дополнительно группе доступна возможность добавлять, редактировать, удалять учетные данные WMI, сканируемые сети WMI, LDAP AD конфигурации, удалять компьютеры и пользователей из отчетов Компьютеры и Пользователи.
- Администраторы коммутации
- Этой группе доступно все, что и группе Пользователи. Дополнительно группе доступна возможность добавлять, редактировать, удалять, коммутировать, раскоммутировать, экспортировать и импортировать патч-панели, порты патч-панелей, порты сетевых устройств, розетки, линии и патч-корды.
- Администраторы конечных устройств
- Этой группе доступно все, что и группе Пользователи. Дополнительно группе доступна возможность добавлять, редактировать, удалять, добавлять в группы конечные устройства, добавлять, удалять и редактировать группы устройств.
- Администраторы мест
- Этой группе доступно все, что и группе Пользователи. Дополнительно группе доступна возможность добавлять, редактировать, удалять здания, этажи, помещения, шкафы и места.
- Администраторы сетевых устройств
- Этой группе доступно все, что и группе Пользователи. Дополнительно группе доступна возможность добавлять, редактировать, удалять, добавлять в группы сетевые устройства, добавлять, удалять и редактировать группы устройств, добавлять, редактировать, удалять учетные данные SNMP.
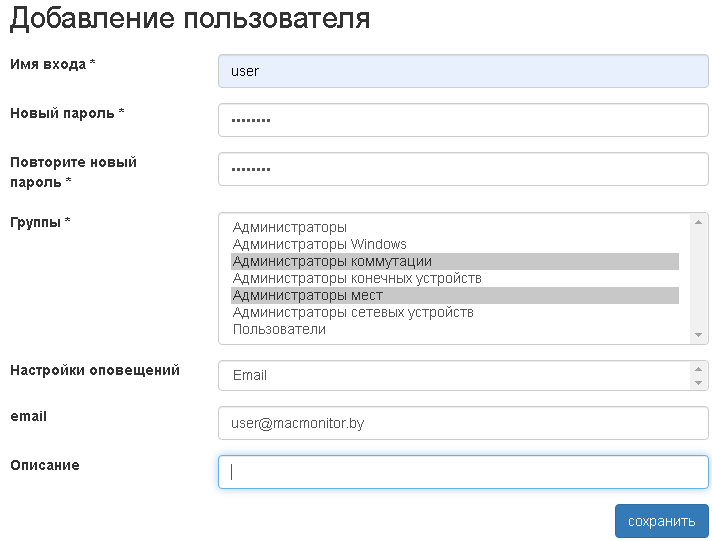
When adding a user, specify:
- Login name;
- New password;
- Confirm new password;
- Groups;
- Notification configurations (optional);
- email (optional);
- Description (optional).
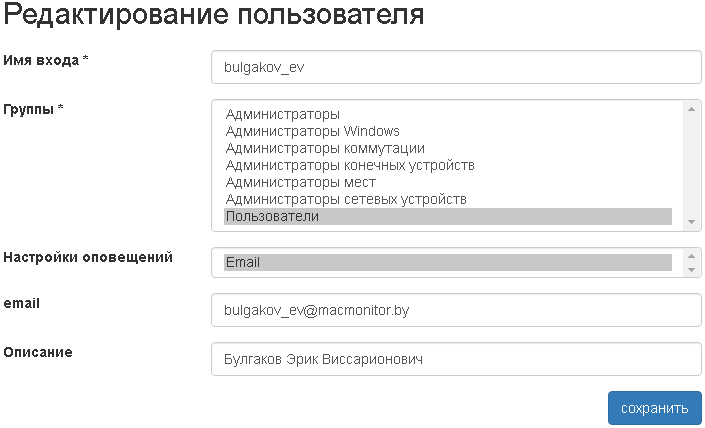
Editing users is similar to adding them.
Change password: any user who is a member of the Administrators group can change any user’s password.

Assign groups: You can select multiple users at once and assign groups to them.

Assign notification configurations: You can select multiple users at once and assign notification configurations to them.

Delete users: You can select multiple users at once and delete them.

Вкладка «LDAP пользовател軶
В этом подпункте меню можно синхронизировать и удалять LDAP пользователей программы. Так же пользователям можно назначать способы оповещений.

Table columns:
- login name;
- email – e-mail to notify the user;
- description;
- groups -groups, which a user is member of;
- notification configurations.
Каждый LDAP пользователь может являться членом одной или нескольких групп (группы присваиваются на основе конфигурации LDAP аутентификации и авторизации):
- Administrators
- Full functionality of the program is available to this group.
- Users
- Этой группе недоступна возможность изменения данных в программе, за исключением запуска SNMP, WMI, DNS, LDAP опроса при нажатии «Обновить» в пункте меню Отчеты→Сеть.
- Администраторы Windows
- Этой группе доступно все, что и группе Пользователи. Дополнительно группе доступна возможность добавлять, редактировать, удалять учетные данные WMI, сканируемые сети WMI, LDAP AD конфигурации, удалять компьютеры и пользователей из отчетов Компьютеры и Пользователи.
- Администраторы коммутации
- Этой группе доступно все, что и группе Пользователи. Дополнительно группе доступна возможность добавлять, редактировать, удалять, коммутировать, раскоммутировать, экспортировать и импортировать патч-панели, порты патч-панелей, порты сетевых устройств, розетки, линии и патч-корды.
- Администраторы конечных устройств
- Этой группе доступно все, что и группе Пользователи. Дополнительно группе доступна возможность добавлять, редактировать, удалять, добавлять в группы конечные устройства, добавлять, удалять и редактировать группы устройств.
- Администраторы мест
- Этой группе доступно все, что и группе Пользователи. Дополнительно группе доступна возможность добавлять, редактировать, удалять здания, этажи, помещения, шкафы и места.
- Администраторы сетевых устройств
- Этой группе доступно все, что и группе Пользователи. Дополнительно группе доступна возможность добавлять, редактировать, удалять, добавлять в группы сетевые устройства, добавлять, удалять и редактировать группы устройств, добавлять, редактировать, удалять учетные данные SNMP.
Синхронизировать пользователей: можно вручную синхронизировать (добавить в программу) пользователей из Active Directory. Для этого должна быть настроена конфигурация на вкладке LDAP аутентификация и авторизация.
Assign notification configurations: You can select multiple users at once and assign notification configurations to them.
Delete users: You can select multiple users at once and delete them.
Вкладка «LDAP аутентификация и авторизация»
На этой вкладке можно задать параметры для LDAP Active Directory аутентификации, авторизации и синхронизации пользователей.
- Username
- Имя пользователя в формате имя@домен. Необходимо только при включении синхронизации пользователей из Active Directory.
- Password
- Пароль пользователя в Active Directory. Необходим только при включении синхронизации пользователей из Active Directory.
- Password confirmation
- Password confirmation
- База поиска для пользователей
- База поиска для пользователей.
- База поиска для групп
- База поиска для групп.
- Primary ldap server
- Основной ldap сервер.
- Secondary ldap server
- Резервный ldap сервер.
- Порт ldap сервера
- Порт ldap сервера.
- Ldap атрибут описания пользователя
- Ldap атрибут описания пользователя.
- Ldap атрибут email пользователя
- Ldap атрибут email пользователя
- Таймаут ldap аутентификации (сек)
- Таймаут ldap аутентификации (сек).
- Таймаут ldap соединения при синхронизации пользователей (сек)
- Таймаут ldap соединения при синхронизации пользователей (сек).
- Таймаут синхронизации ldap пользователей (сек)
- Таймаут синхронизации ldap пользователей (сек).
- Период синхронизации ldap пользователей (мин)
- Период синхронизации ldap пользователей (мин).
- Активировать аутентификацию ldap пользователей
- Активировать аутентификацию ldap пользователей.
- Использовать ldap аутентификацию как аутентификацию по умолчанию
- Использовать ldap аутентификацию как аутентификацию по умолчанию.
- Активировать синхронизацию ldap пользователей
- Активировать синхронизацию ldap пользователей.
- Соответствие групп программы группам Active Directory
- Для каждой группы программы необходимо задать соответствие группы в Active Directory. Необходимо использовать аттрибут cn группы из Active Directory.


Submenu “Notification configurations”
There is an ability to configure receiving notifications about the availability/unavailability of network devices and endpoints. Notifications can be send to email.
Notification configurations can be added, tested (send a test message to work of a notification configuration), edited and deleted.

Table columns:
- name;
- activated;
- details.
When adding a notification configuration, you must specify:
- Name
- The name of the notification configuration.
- SMTP server
- Hostname or ip address of the SMTP server.
- SMTP server port
- SMTP server port (25 - for SMTP, 465 - for SMTP SSL/TLS).
- SMTP email
- email recipient.
- Connection timeout
- Connection timeout in seconds.
- Number of concurrent connections
- The number of concurrent connections to the smtp server.
- Connection security
- Note that the validity of the server certificate is not checked for the encrypted connection.
- Authentication
- Authentication (optional field).
- SMTP user
- SMTP user (optional field, only if authentication is enabled).
- SMTP user password
- SMTP user password ( optional field, only if authentication is enabled).
- Activated
- Activated.

Note
Есть возможность послать тестовое письмо (должен существовать хотя бы один пользователь с email). Для этого необходимо нажать кнопку тест при добавлении способа оповещения.
Editing a notification configuration is similar to adding it.

Delete notification configurations: You can select multiple notification configurations at once and delete them.

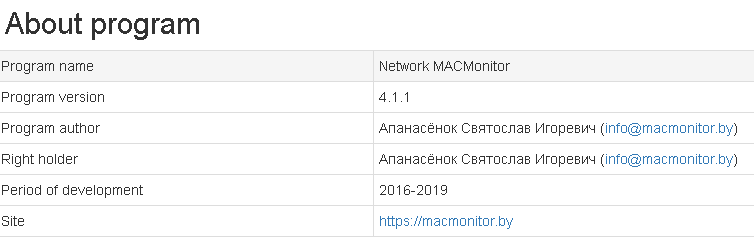
Submenu “License”
License information tab
This tab contains information about the license activation file installed for the trial and commercial license.

Описание строк таблицы:
- License type
- Free, trial, commercial.
- Temporary
- Yes - the license is limited in time, no - the license is not limited in time.
- License identifier
- The unique identifier of the trial or commercial license.
- Organization
- The name of the organization that has been given a trial or commercial license.
- The corporate e-mail address of the contact person of the organization that has been given a trial or commercial license.
- Maximum number of monitored ports
- The maximum simultaneous number of ports on which mac addresses are monitored.
- Лимит количества скоммутированных портов
- Максимальное количество портов сетевых устройств, к которым подключен коммутационный кабель.
- Maximum number of monitored computers
- The maximum simultaneous number of computers monitored via WMI protocol.
- Expiration date
- The expiration date of the temporary license.
- Generation date
- The date when the license activation file was generated.
- Current date
- Current date.
- Allowed ip addresses
- IP addresses that a computer with a program allowed to have on its network interface (for trial and commercial licenses).
- Real ip addresses
- IP addresses that the computer has with the program on its network interface (for trial and commercial licenses).
- Ip addresses match
- Check that real ip addresses include allowed ip addresses (for trial and commercial licenses). If the value is not, then the number of monitored ports will be limited to ten and the number of monitored computers will be limited to ten.
Generate license request tab
On this tab, you can generate a license request file for the subsequent receipt of a trial or commercial license activation file.
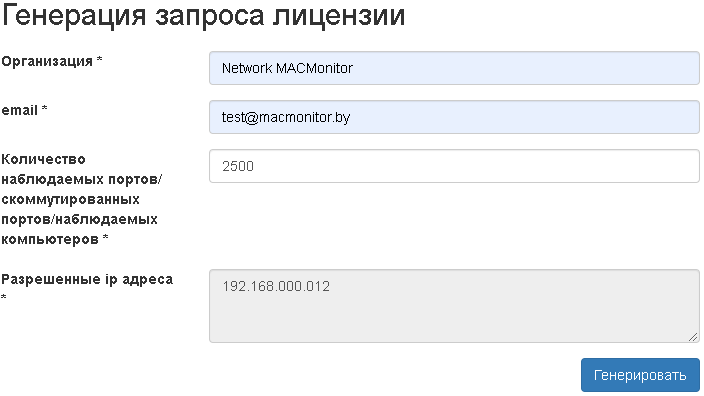
When generating the license request file, the following fields must be filled:
- Organization
- The name of your organization;
- Corporate e-mail of the contact person of your organization;
- Количество наблюдаемых портов/скоммутированных портов/наблюдаемых компьютеров
- Желаемое количество наблюдаемых портов/желаемое количество скоммутированных портов/желаемое количество наблюдаемых компьютеров;
- Allowed ip addresses
- Non-editable field, ip addresses of the network interfaces of the computer where Network MACMonitor is installed. The allowed number of ipv4 addresses is 1, the allowed number of ipv6 addresses is 2. If there are more addresses, you must correctly configure the network interfaces of the computer where the program is installed so that the limits are not exceeded, and only then generate a license request file.
After the request file has been generated, it should be sent to the email address info@macmonitor.by and you should wait for the license activation file to be sent to email specified in request.
Install license tab
On this tab, it is possible to install a trial or a commercial license activation file. To do this, select the file and click install.